Hobo Tintypes
I’m not sure who came up with the name for “hobo” tintypes. Was it John Coffer? Somehow, I’m guessing it was. If you don’t know what a hobo tintype is, it’s a piece of random thin metal, coated with black japan, or bitumin, or asphaltum of some type, then sent through the wetplate process to create a photograph.
I feel like the best hobo tintypes are those made on some type of reclaimed material, saved from the landfill to create a piece of art.
When I first got into the wetplate process, I had read about the process of japanning plates but it looked like such a huge mess, and pain in the ass, and I’d decided at that point I’d NEVER try something like that!!
And yet, here we are.
It IS a HUGE mess, but it’s becoming one of my favorite ways to make plates. A friend recently told me that the reason we all do the wetplate process is “because we like to suffer”, and I’m pretty sure that’s correct! We LOVE it!!!
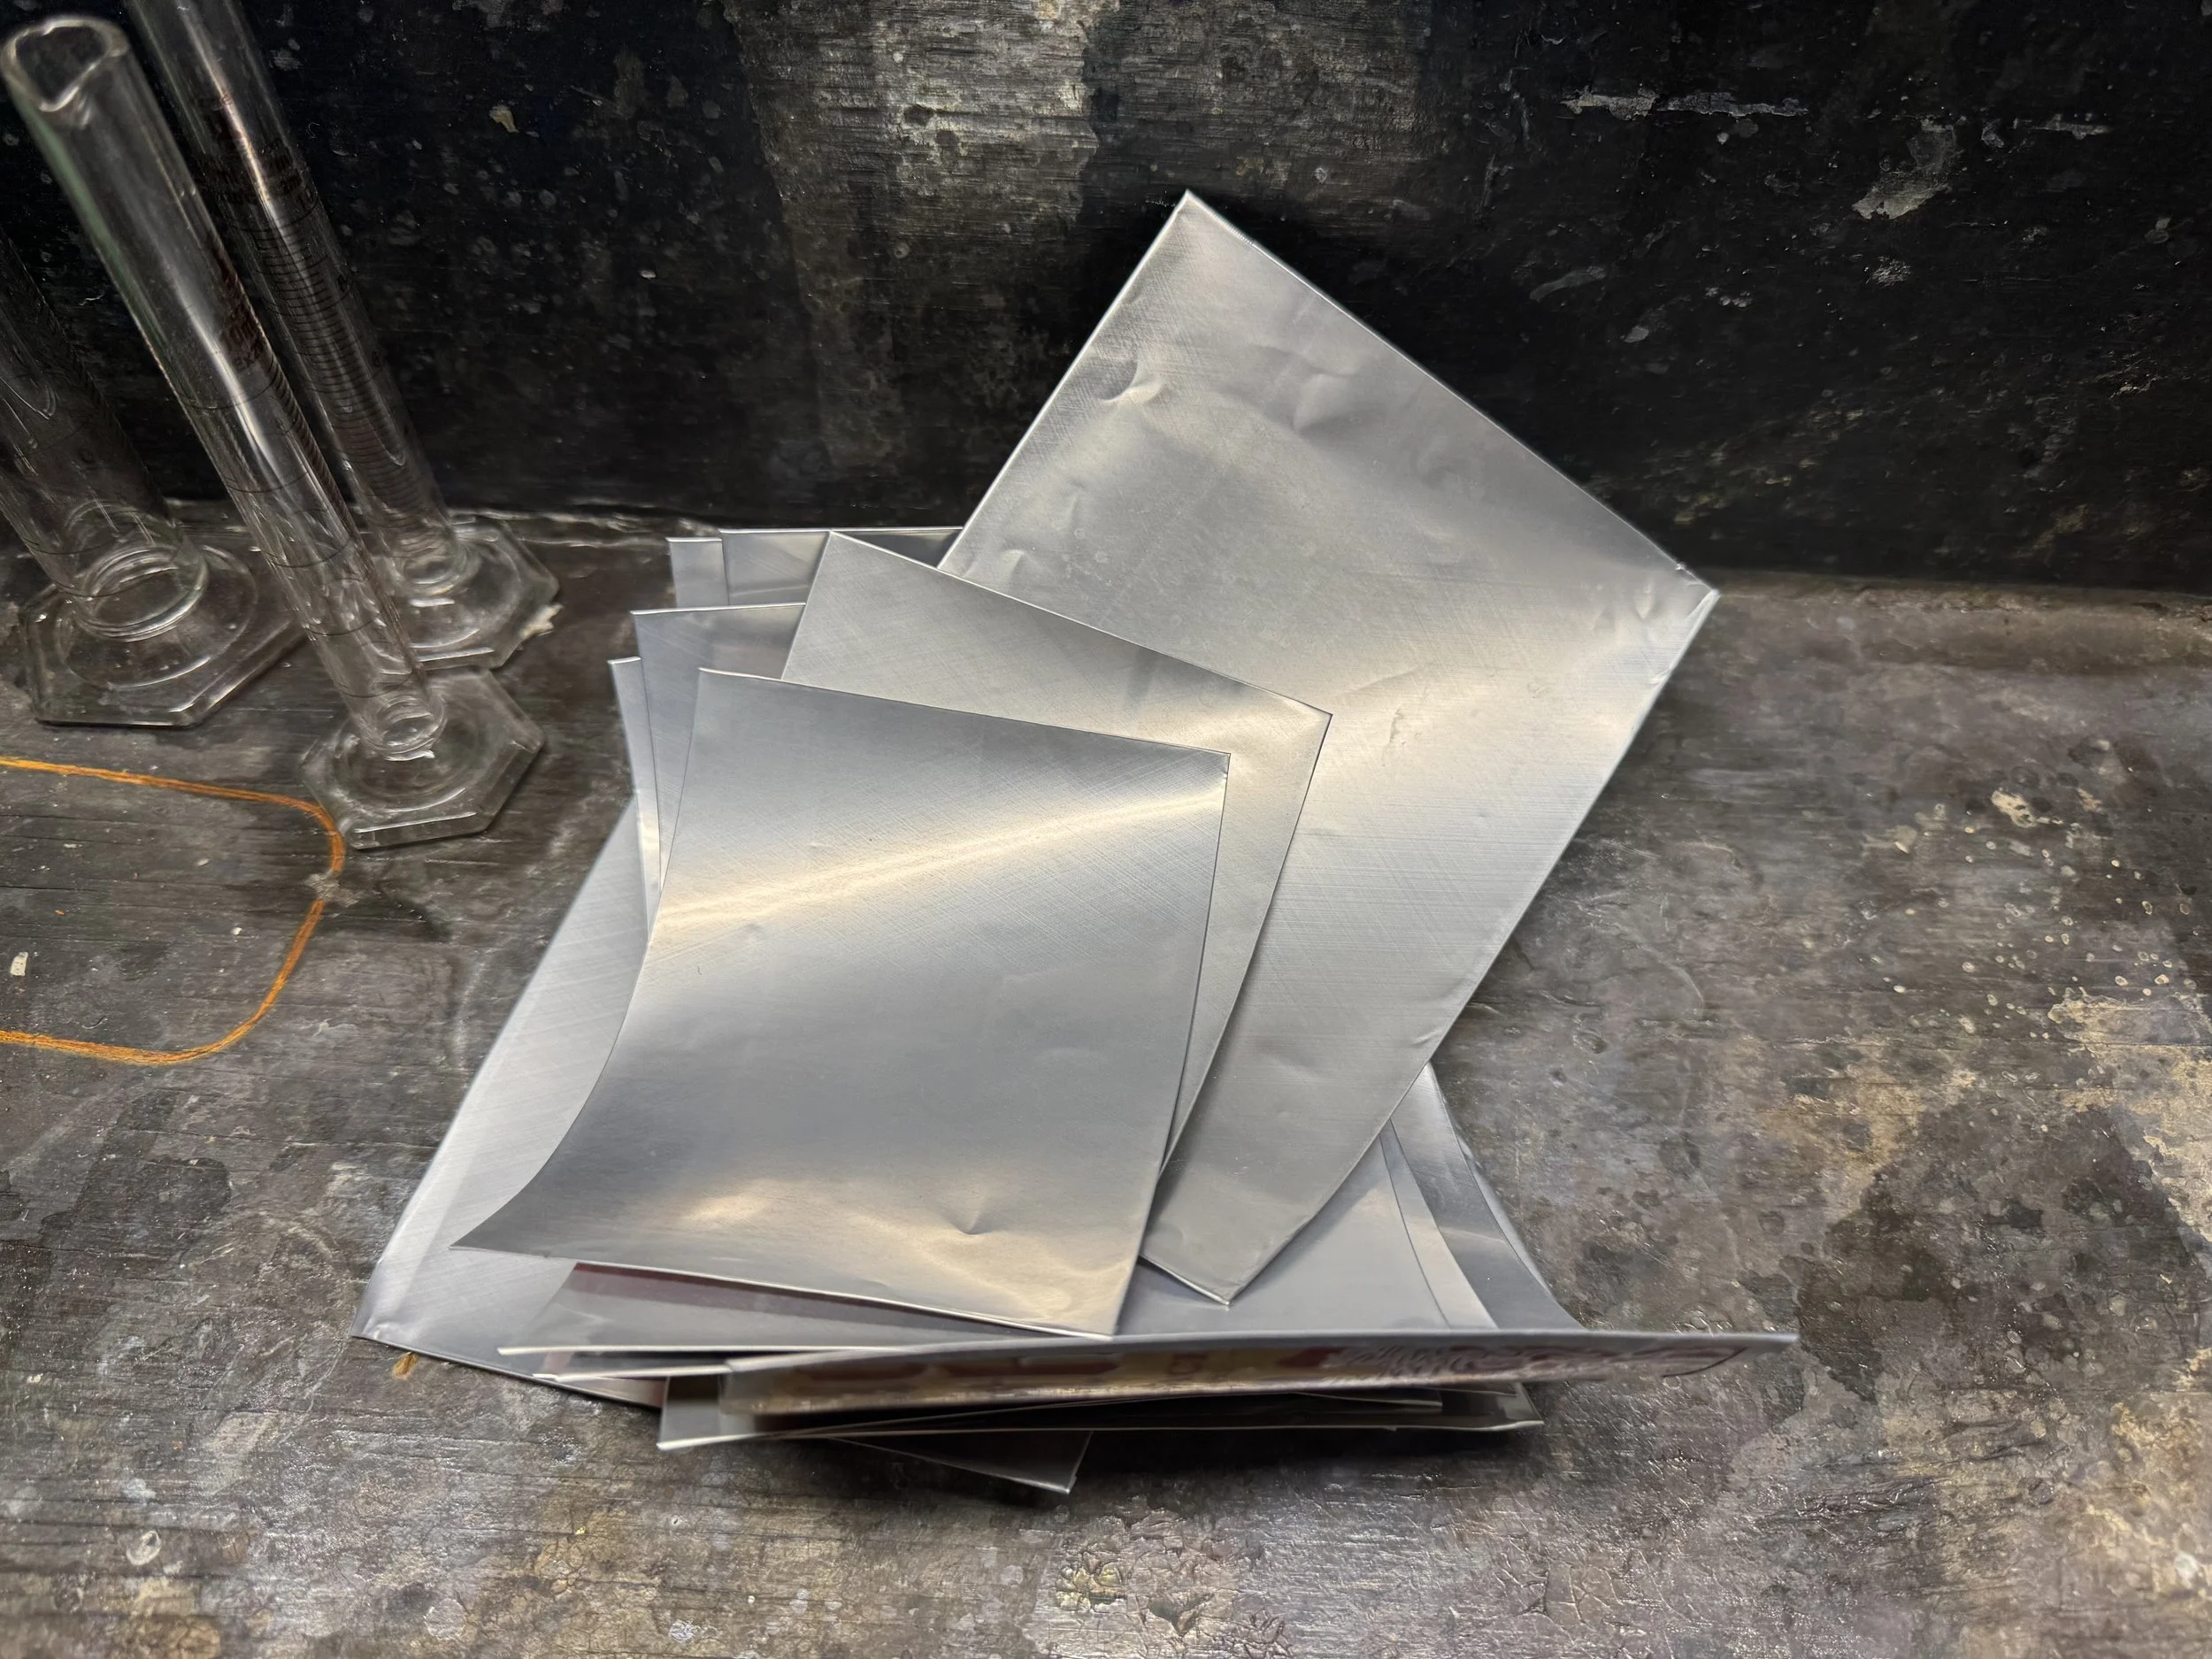
I looked for a while for some old tin cans, or cookie tins, or anything that I thought would work to make plates (something that could be cut to 4x5 or 5x7 size, and was able to be flattened) but couldn’t find anything (and I’m impatient) so came up with the idea of using aluminum cans. I happen to be slightly addicted to some of the various flavors of Liquid Death teas, and their cans are tall which make for enough room to cut a 5x7 “plate” out of the can.
I start by using tin snips to cut the can open. I start in the mouth of the can, and cut the top off first. I then split the can (keeping in mind what text/images I want to keep and be seen on the back of the plate, and as I get to the bottom of the can, I turn the snips and cut the bottom off.

Next comes trimming the plate.
At this point, the aluminum is very curly, I’ve finally found a way to make it fairly flat, but I do that as a last step so I’ll cover that later.
You can trim the plate however is easiest for you. I started doing it with a utility knife and cutting on one of the cutting pads, and that works fine. Recently I switched to cutting them with a guillotine type paper cutter, and I find that’s a little easier and faster, especially since there’s a ruler to go by on those that saves having to measure.
I cut the plates 3/8” oversize, which allows me to turn over the edges so they aren’t so sharp, and turning the edges helps slightly with flatness. So, for a 5x7 plate, I cut it 5 3/8” x 7 3/8”.

I trim to edges straight, then trim the opposite edges to size using the ruler grid on the paper cutter.
Next comes rolling over the edges. I use a piece of trophy aluminum, that is cut a bit smaller than the size of my plate holder, as my template. About 1/16” smaller, or a little more, seems to be plenty.
I center my template on the back of the trimmed aluminum can, and use a wooden wallpaper roller to bend the edges of the aluminum can. I start with two opposite edges, roll those completely over, then do the other two edges. This take just a bit of practice so that when you turn the can edges you keep them TIGHT to the template.
After rolling the edges of the plates, be SURE SURE SURE that they fit your plate holder!!! You DO NOT want to find out they’re bit too big once you’ve covered them with collodion!!! Been there, done that, and been SO SO MAD!!!!
Next up, is flattening the plates…..and I have mixed feelings about this. I did not flatten my plates in the beginning and just learned to work with their curliness. I have found that I can somewhat flatten the these thin plates by wrapping them backwards around a piece of 1” PVC pipe (or something of similar size). If just the reverse wrapping doesn’t work, applying a little heat from a heat gun usually does the trick.

The “problem” that comes up when trying to flatten the plates is that almost inevitably I get some wrinkles. I don’t necessarily mind them, these are absolutely handmade and I like them to reflect that, but when I don’t try to flatten the plates, that super smooth inside finish on the aluminum cans gives a fantastic glossy finish, and I hate to lose that. So, if you’re trying this process out, try it both ways, curly and flat, and you can pick what you prefer. (I’ll show you how to deal with the curly plates below - how to pour collodion and varnish on them.)

Last up, cleaning the plates — aluminum cans have a coating on the inside that protects the aluminum from the beverage and vice versa. When I started I didn’t bother to clean the inside of the cans but eventually had some trouble with the asphaltum peeling/cracking in a few places on the finished plates. After advice from friends, and some online research, I read about the protective coating inside the cans. Since then I’ve started scrubbing the inside of the can with a Magic Eraser pad and either acetone or alcohol, then giving the can a good rinse under the tap.

Now comes the fun [NOT SO FUN] part! Coating with asphaltum. If you think you have to be careful with your silver bath staining everything, this stuff is worse, just because it’s so sticky….and seem to multiply as you use it.
I recommend covering everything, wearing an apron and gloves. It doesn’t seem to bother my hands, it’s just easier to throw away the gloves at the end rather than try to clean my hands.
This is the asphaltum that I use, from Takach Press. LINK to the asphaltum

You can click the photo to go to the website.
It is VERY thick (viscous) straight out of the can (which is great like it is to coat ambrotypes), but it’s too thick to brush on hobo tintypes. I dilute it with mineral spirits, 4:1, that’s 4 parts asphaltum to 1 part mineral spirits. And I measure that by weight, the stuff is too nasty to put in any kind of measuring beaker. I just mix in a pint canning jar with a lid, stirring it up with a stick.
I then brush it on the aluminum can plates. I started with a cheap paint brush, but have recently found that the cheap foam brushes work better for me and seem to leave less bubbles. I then hang them to dry by one corner. When I tried drying them flat, the asphaltum would puddle in the low places.
You defintely don’t need to watch all of this, but it’ll give you some idea of how I apply the asphaltum. Note that there will be some brush strokes as you apply it, but these tend to smooth out after you hang the plates to dry.

You can see the mess under the plates. Definitely cover your table or wherever you work!
I usually let the plates hang for several hours (longer in cooler temperatures). By then, the asphaltum has set enough that you can lay them flat. However, I’ve also found that the plates collect less dust if hanging vertically, so I often leave them hanging overnight if I’m not in a rush. By the next day they’re usually dry enough to handle and the surface is no longer tacky. I have shot them the next day after coating, but usually try to let them dry at least a couple of days.

If your mix is a little thin, you’ll sometimes get this brownish color towards the top of where the plate is hung. Happens in warmer weather. I just add a bit more asphaltum to my mix to thicken it up a bit if I see it running off too fast.
POURING collodion, and later varnish, on these plates can be a pain. They’re very flimsy and rarely flat. I came up with the method below and it has worked well for me for both types of pours.
I clamp the hobo tintype to an aluminum trophy plate of the same size, with binder clips at all four corners, or you can use three clips, and the unclipped corner is held down by your thumb and becomes the pour-off corner.


IMPORTANT: THE COLLODION YOU USE MATTERS!!!!! When I first started doing these, I was getting terrible fogging of the plates. NO blacks at all (and the beautiful blacks of these are one of their best features). I thought maybe it was exposure or developing but couldn’t get a decent plate. I finally send a few plates off to a friend (Courtney, y’all know her) , who shot them with her chemistry, and she got no fogging!!
I was using my favorite collodion, UVP-X, and had tried UVP’s Z also. She uses a quick clear formula and a slight variation in her developer, and NO FOGGING. After switching to the formula she uses, no more problems. SO, use a more traditional collodion formula. I’ve found that Old Workhorse works well too. (I did speak with Brian at UVP and he has japanned plates in the past with no problems when using UVP-X. I can only suspect there’s something different in the asphaltum I’m using that’s reacting with the UVP-X.
If you have questions about anything here, I’m glad to try to answer them. You can contact me here, or DM through Instagram: @johnberryphotography
A few of the hobo tintypes I’ve shot so far below, including some that have cracked or peeled because of insufficient cleaning.


