Orotones, using collodio chloride emulsion
Let’s start by saying my method of creating orotones is not “historically correct”. Or at least, I’m not making them the way they were made in the 1920’s, 1930’s ……. My methods involve using materials that are readily available now, and materials that I have found easy to work with (and I have no doubt that had gold spray paint been available in 1920, it would have been used vs the various concoctions that were popular then).
Essentially, an orotone is a positive image on glass, backed with “gold”, as in the color, not the chemical element (Au), and I think that’s really the only criteria.
If you’d like a somewhat long and technical look into orotones and how they were traditionally created, this article by Richard Stenman will make you happy.
I’m not sure what, when, or where I saw my first orotone, but I immediately loved the warmish/brownish tones, something different from “sepia”. It made them feel old but also somewhat inviting because of the warm tones. I started looking into them through searches, but couldn’t fine much info (and still can’t). The “breakthrough” came with we watched the series “1923” and I saw the orotones used for some of the intros to the series, and then, most importantly, found the work of Sarah Coulter (website) (Instagram), who created the orotones for the series. See below, watch it all the way through.
The HUGE HUGE thing I got from the above video was the use of the collodio chloride emulsion from UV Photographics (link to product). Previous to that, I had no idea what to use as the light sensitive emulsion. I had tried salted collodion as I would use with wetplate, but that didn’t give me what I was looking for.
Step #1: Glass prep
Clean your glass with whatever is your preferred method. Currently, I’m using a Windex product that contains vinegar, and scrubbing with a Magic Eraser pad. Once that’s done, I sub the whole plate with albumin. I’ve found the subbing critical for the adhesion of the collodio chloride emulsion. The few times I haven’t subbed the whole plate, all of the emulsion just floats off in the first wash.
For subbing, I use the powdered egg whites. I stir one tsp of powdered egg white into approximately 250ml of hot tap water using a little paint mixer on a battery powered drill. This seems to be the fastest way to get the egg white dissolved. I then scoop off the foam that forms, and just brush the albumin onto the clean glass with a foam paint brush. Don’t over-brush, that seems to create bubbles. I usually do this right after cleaning the glass and don’t worry if the glass is dry or not. Seems to work fine for me.
Step #2: Pouring the collodio chloride emulsion
This is done just like you would for collodion on wetplate (if you do wetplate). I pour a puddle in the middle of the glass, then tilt the glass until I have coverage of the whole piece of glass.
In the video above, I’m making a orotone diptych by printing two collodion negatives simultaneously on a large piece of glass. You’ll see that diptych throughout the rest of this post.
It’s important to wait long enough after pouring for the collodio chloride emulsion to dry! Otherwise your negative may stick to it. The emulsion dries fairly quickly, but I speed it along by pointing a box fan at the plate, and usually try to wait 20-30 minutes before printing. Check the pour off corner and make sure it’s dry there. The emulsion is usually thickest there and so takes the longest to dry.
Step #3: Exposing the plate
Once the emulsion has dried, the plate is exposed by contact printing with a negative. This negative can be a digital negative (image printed on clear acetate), a film negative, or a collodion negative. And, of course, dry plate negatives can be used also.
Exposure time of course depends on the density (lightness…darkness) of your negative. If you print cyanotype, I’ve found the exposure times for collodio chloride to be very close to the exposure time for cyanotype, so that makes for a good starting point (and when I’m really unsure of the exposure needed, I’ll sometimes print a cyanotype as a test image).
Negative(s) go emulsion side down onto the glass plate.
You’ll have a beautiful brown to reddish image, and it should be somewhat dark. It will lighten up considerably after fixing.
Step #4: Washing and fixing the plate
Once the exposure is done, excess and unused emulsion needs to be rinsed from the plate, rinse being the key word here. I typically put the plate in a tray and rinse it under running water, stopping to agitate the tray for a few seconds, dump the water, rinse and agitate again. I do this 3-5 times and that seems to be enough.
Next up is fixing the plate. I’ve used “rapid fix”, or ammonium thiosulfate, as well as hypo, and both seem to work equally well. I’d avoid using KCN as the fixer for this process. I used it once, left the plate in the fixer just a minute too long, and the KCN ate the entire image away. I’m not sure why it worked so quickly, something to do with the emulsion I’m sure.
Fixing goes VERY quickly, so I usually leave the plate in the fixer for around a minute or less.
OPTION — Gold toning: For gold toning, I use this from UV Photographics, and Bostick & Sullivan carry it as well. Gold toning can be done before or after fixing. For ME, I can judge the final color a bit better if I tone after fixing, so I usually do it that way. Lately, I’ve preferred the warmer color of the untoned plates, so I’ve been doing less gold toning, but it really depend on the image and the feel that I want to get out of the protons.


Top to bottom above: Top: Gold toned for 3 minutes, Middle: Gold toned for 20 seconds, Bottom: untoned.
Step #5: Painting the plate - gold
Edited to add this, sorry for not adding in the beginning.
Once the plate is dry, I go ahead and varnish it just like I would wetplate. I don’t think this step is crucial, but I like to think it adds an extra later of protection between the emulsion and the paint. And yes, I do typically paint the emulsion side of the plate because I like the look of doing that the best. I have painted the glass side, and depending on the thickness of the glass, there’s a nice “separation effect” (don’t know how else to describe it) when the image is separated from the paint layer.
My favorite gold paints are the metallic gold ones. They add a shimmer or shine that I think really enhances the look of the final plate.
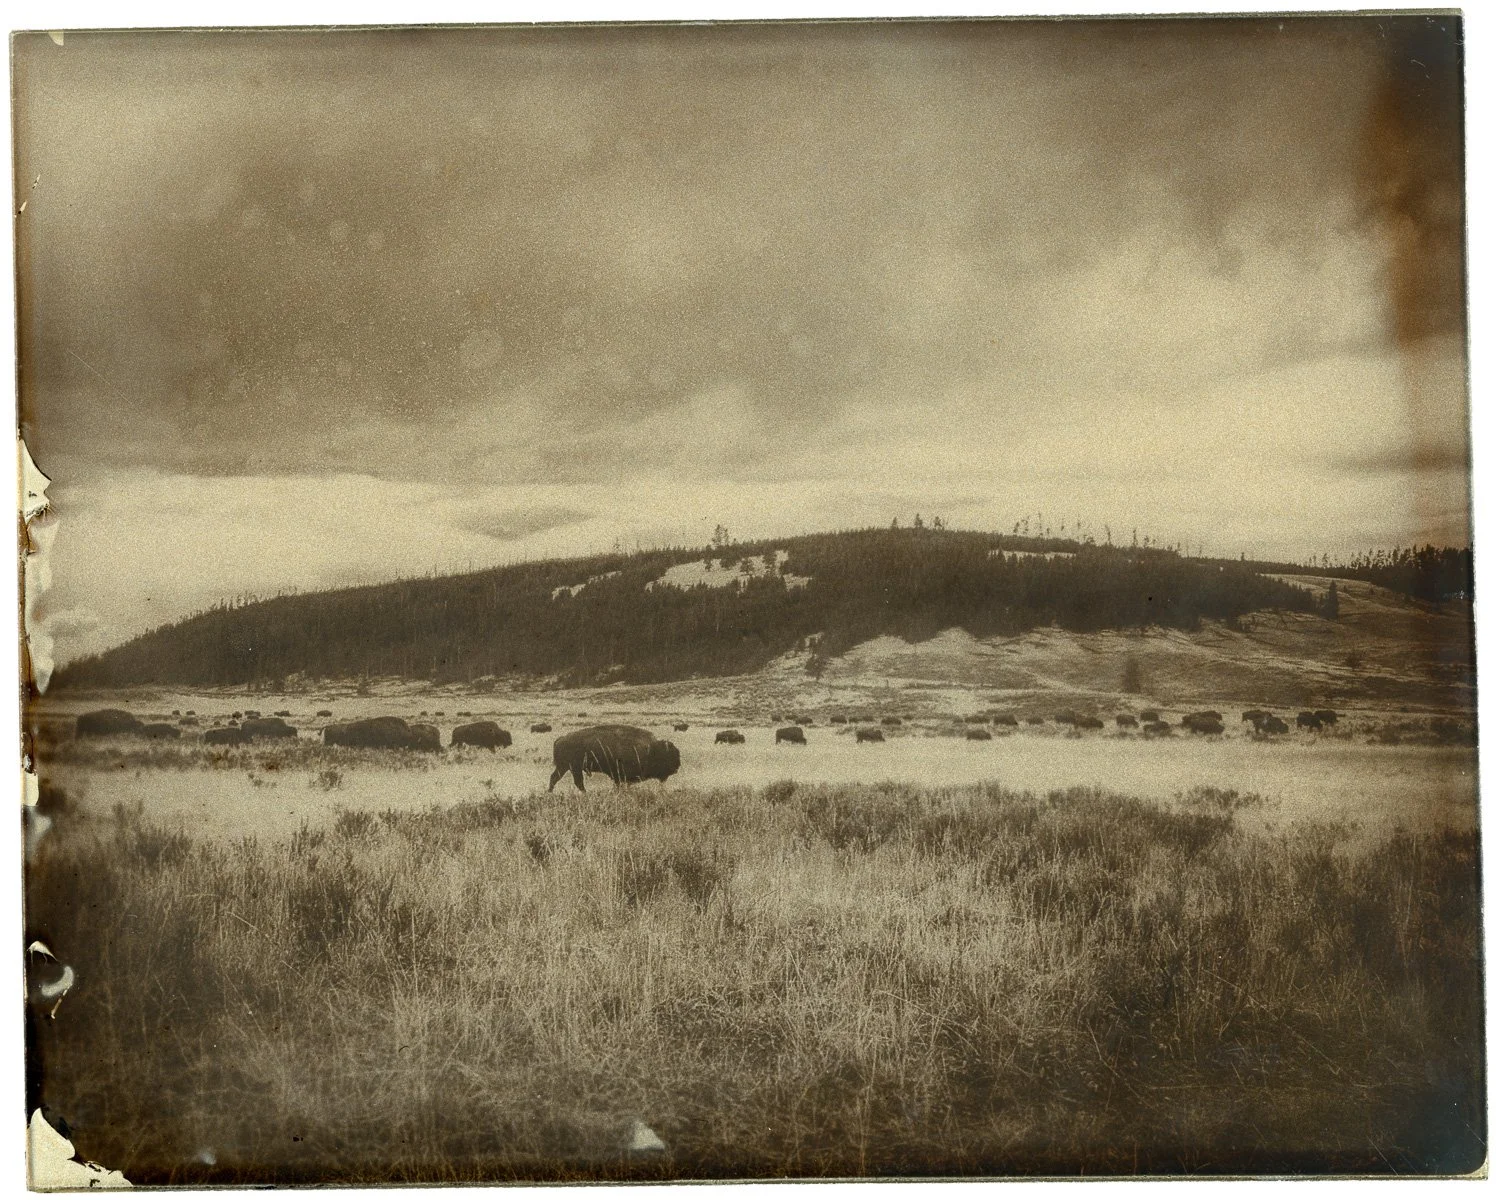
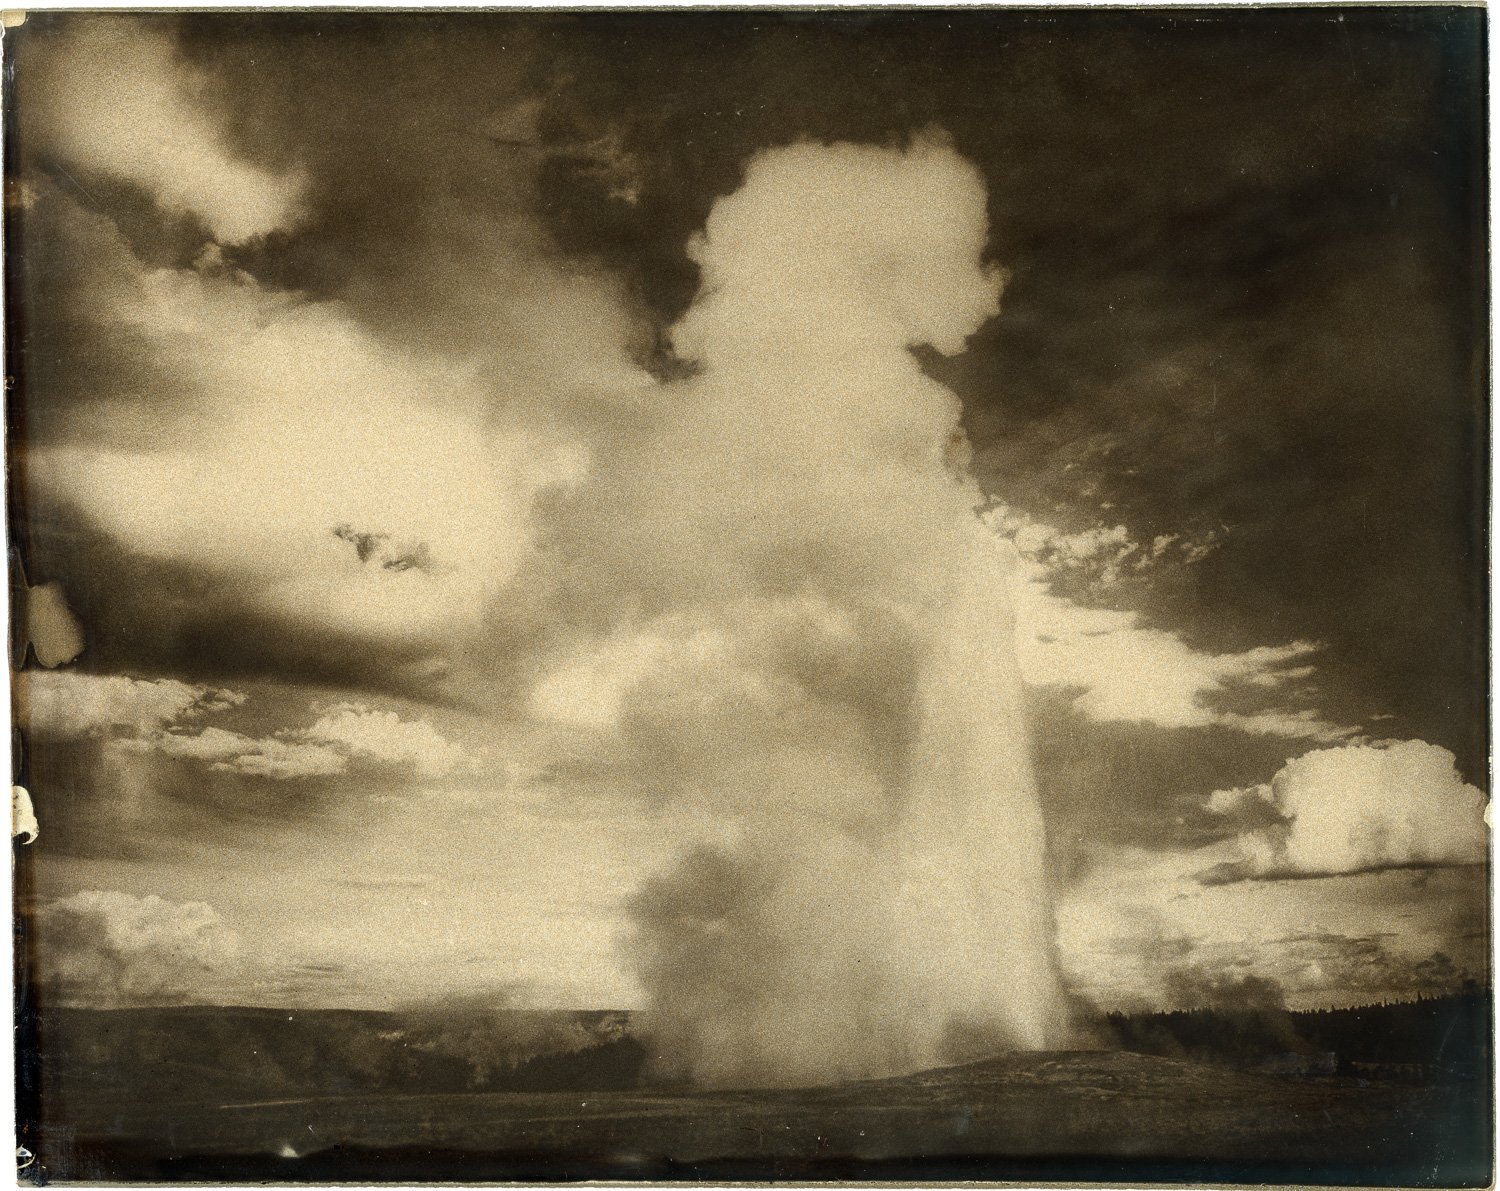
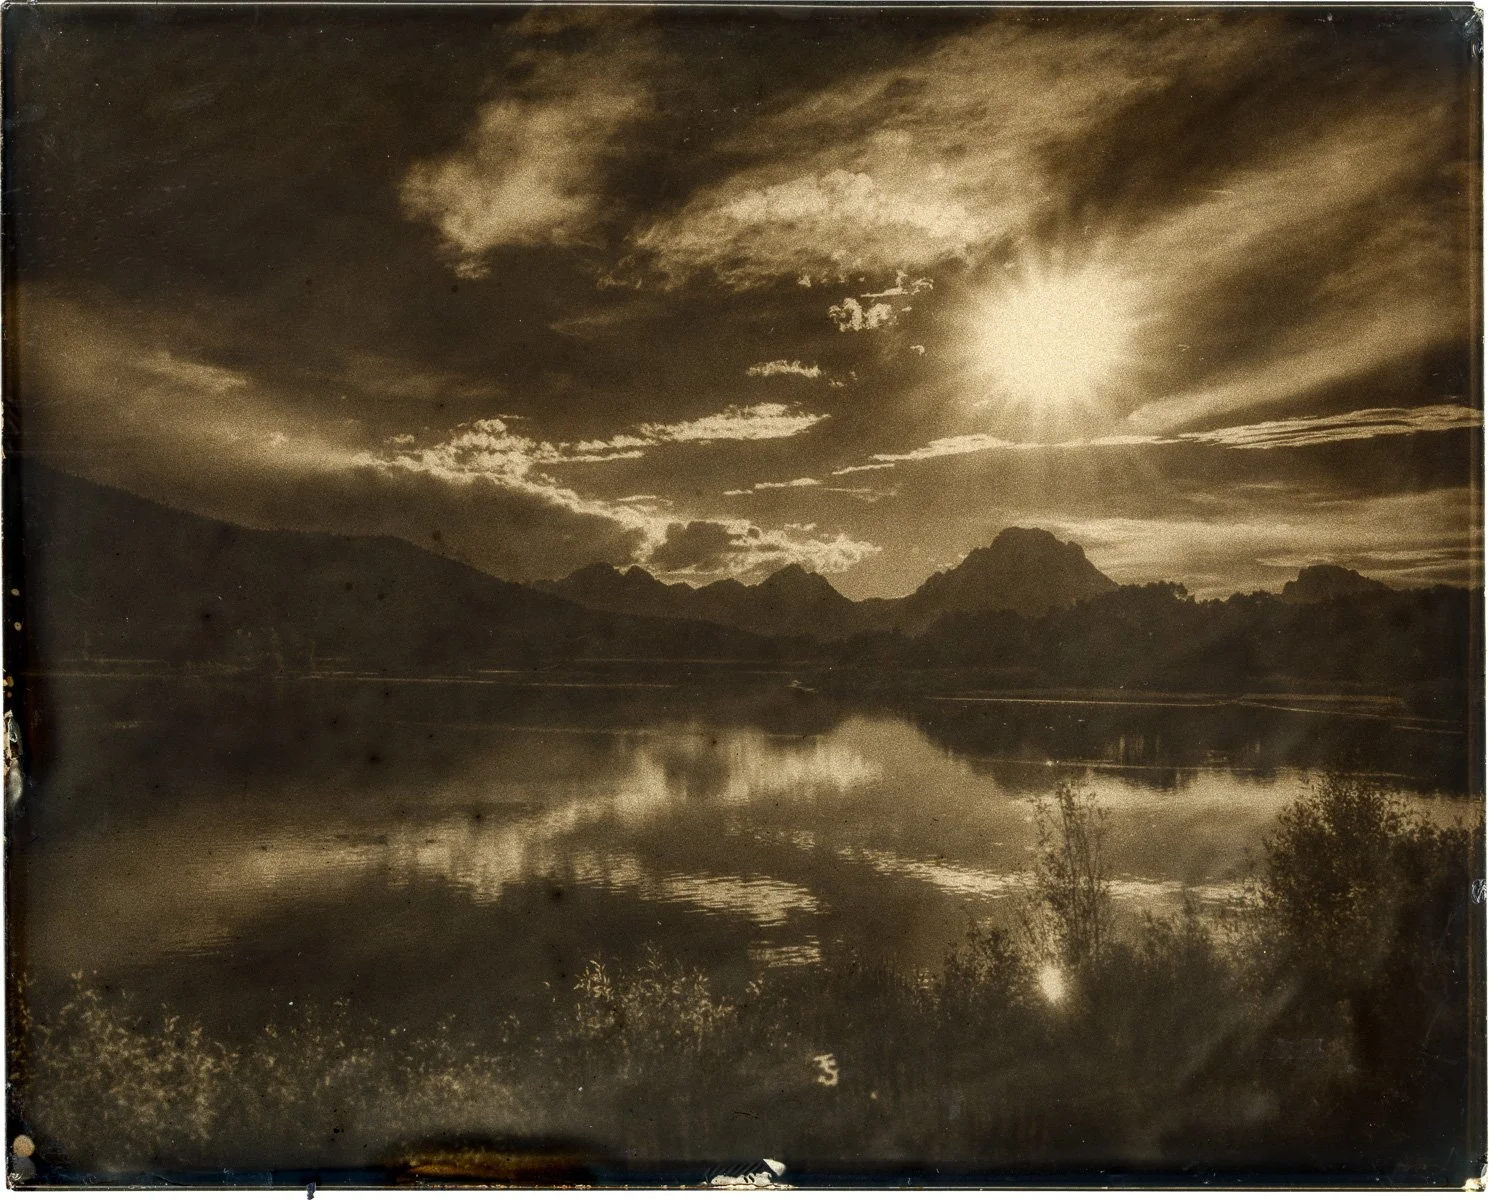
A few orotones below: